
Skip To Section: Image File Types | How Big Should Your Image Be (KB) | How Big Should Your Image Be (WxH)
Saving a JPG for Web | Saving a PNG for Web
As a graphic designer in mid-2016, most completed client projects wind up in digital format – graphics for the website, PDFs for download, social graphics, data sheets, brochures – rather than being sent to a printer. These files need to be clear, appropriately sized, and most importantly, small (as measured by kilobytes, not pixels). This guide will show you step-by-step how to optimize images for web using both JPG and PNG formats.
Preparing files for print is incredibly different than preparing them for availability on the web. Print files require high-resolution photographs (generally 300 dpi, or dots per inch), outlined text, bleeds for edge-to-edge color, uncompressed images, transparency settings, all sorts of crazy stuff.
In the end, print file sizes wind up being quite large (I’ve sent a 120MB multi-page catalog file to a printer before). If you think anyone is going to download a 120MB anything from your site (unless it’s actually a huge software package), I’ve got some bad news for you: they won’t.
After seeing one too many websites loading in a 3.0 MB full width background image, I wanted to take a moment to talk about preparing digital assets, specifically images (PNG, JPG, GIF), for the web.

Image File Types: PNG, JPG, GIF, PDF
When saving an image from the web to your computer, you’ll usually see it saved as FILENAME.JPG, FILENAME.PNG, or FILENAME.GIF. If you download a brochure file, you’re likely to see a FILENAME.PDF. PDFs aren’t image files but they’re used extensively as digital asset downloads.
When to save it as a JPG/JPEG
When working with your own image, save it as a .JPG file when it’s a photograph, a picture with a lot of colors (more than 256), or an image that contains gradients.
When to save it as a PNG
PNG files are great for logos, vector artwork, solid colored shapes, or any image where you need transparency.
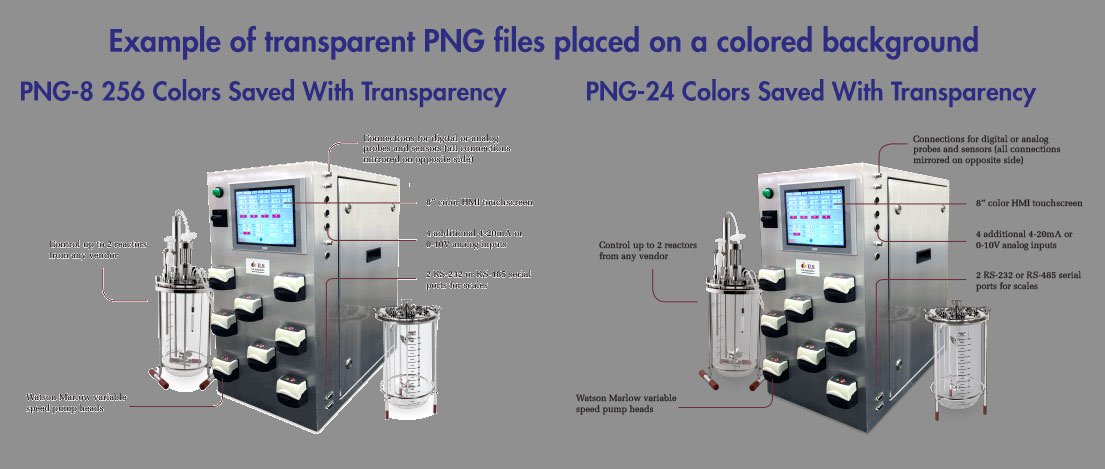
If you’re saving a file for web out of Photoshop, there are two PNG formation options: PNG-8 and PNG-24. PNG-8 offers a smaller file size but limits you to a max of 256 colors, and a questionable transparency option (PNG-8 transparent images usually display jagged, ugly edges).
PNG-24 images are a godsend – they can save complex images in JPG-like quality WITH a transparent background. So why not use them for everything? Their file sizes can be HUGE (but we’ll talk about how to compress these later).
When to save it as a GIF
There is a lot of overlap between GIFs and PNG-8 formats. GIFs are special because they are the format that allows animation (GIPHY, anyone?). If you’re saving a file and trying to decide whether to save as a PNG or a GIF, try both to see which gives your image more clarity and a smaller file size and pick the format that gives you the best result.
When to save it as a PDF
Any design that’s formatted like a page, not just a stand-alone image – a trifold brochure, a 1 or 2-sided sales flyer, a poster, a menu, a case study, and eBook or white paper.
Saving a file as a PDF preserves the page layout and design for anyone that downloads the file. It also allows for easy, clean reading as the text in a PDF is scalable and preserved, and the text is also searchable using Ctrl + F (really useful for long, text-heavy documents).
We won’t be going over PDF compression in this guide as it’s complex enough to require it’s own post, but we wanted to mention it to include the most common digital assets you’ll encounter that require some optimization for web.

How Big Should Your Image Be (KB)?
This is personal preference, and it’ll vary depending on the balance you’re trying to strike between lightning-fast site load speed and crisp, beautiful images.
We try to keep images used on our website under 75 KB (kilobytes) – the smaller the better – and as small as possible without making the image look bad. Some very large header-type/banner images that are full screen and tall might squeak by at 150KB, but we highly recommend keeping 100 KB+ images to a bare minimum (use only when it’s absolutely necessary).
Think to yourself: Do you really need a big banner image on that page? Will it add value for your visitors and increase conversion rates? If not, skip it.
Adding a 100 KB image to a page on your website can add extra seconds to your load time. To mobile users, that 100 KB could be the difference between them making a purchase or closing your site’s tab.

How Big Should Your Image Be (Width x Height)?
There’s no reason to load a giant image file on your webpage and then expect WordPress to scale it down for you. The site is still loading the original, giant image file (unless you’ve selected a thumbnail or scaled-down size using WordPress), thus wasting precious KB in load time.
Wanna know the secret to mastering W x H optimization? Save your image to the EXACT SIZE you need – no larger, no smaller.
Here’s a neat trick I use all the time: Get a Firefox browser add-on called MeasureIt. Once it’s installed, open the webpage on which you want to add your image.
Click the MeasureIt button in the Firefox toolbar. Your screen will gray out and you’ll have a crosshairs cursor. Use the tool to draw a rectangle where you want your image. Note the W and H values. Crop/resize your image to that exact size. Save the file for web. Done.
Exclusive Bonus: Download the step-by-step checklist that will show you the 12 best methods to speed up your WordPress website (tip: image optimization is at the top of the list).
Step-By-Step: How To Optimize Images For Web JPEG
I’m going to use a giant image from the free image stock library Unsplash.
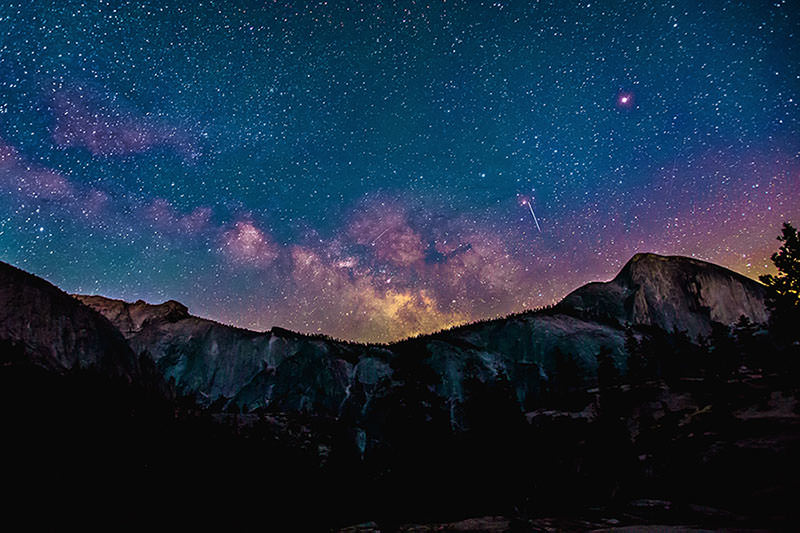
This photo is best suited to be saved as a JPG (not a GIF or PNG) because it has a LOT of colors and it’s not a logo or vector-style image. Rule of thumb: If it’s a photograph, save it as a JPG.
1. The original photo I grabbed for this example is 6.4 MB. You can check out the original photo here, but I’ll be using optimized images for this blog post so that it doesn’t take 12 seconds to load 😉 We cannot use a 6.4 MB size image on a website, so we need to scale it down.
2. Let’s say we want to take this image and add it to my web design page (where I currently have a “40% more traffic” graphic). The first thing we’d do is measure the space where this graphic is going using the MeasureIt tool:
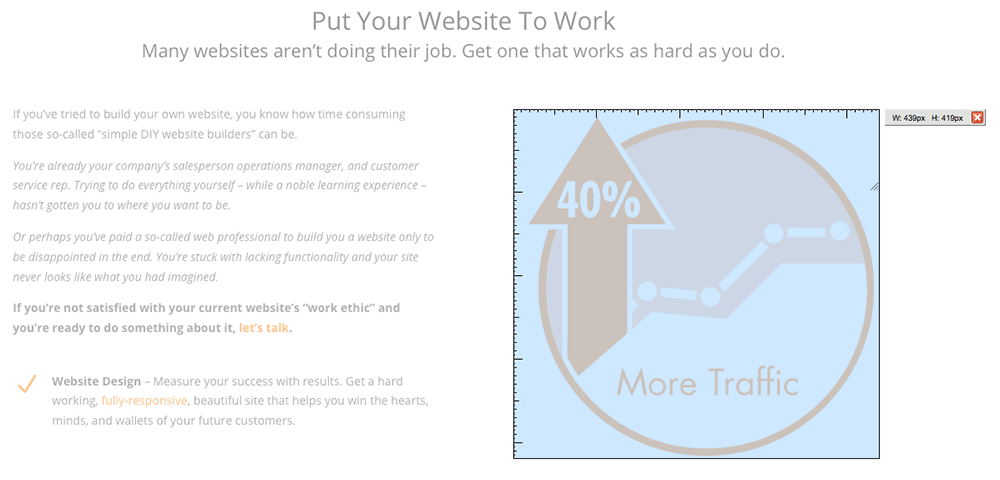
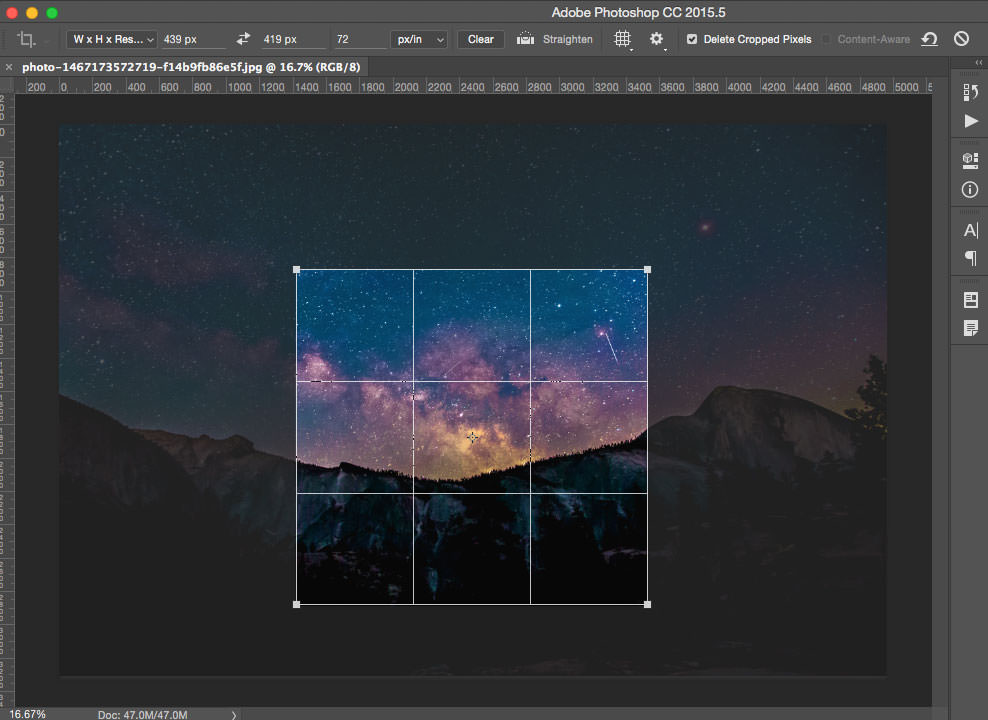
3. From the measurement, we can see that my Unsplash image needs to be around 439px (pixels) wide x 419px high. We’re going to open the Unsplash image in Photoshop, then use the crop tool to make it this size.
Editor’s note: If you don’t have Photoshop and find yourself editing images frequently, I’d highly recommend checking out Adobe’s lowest tier Creative Cloud monthly plan. For $9.99/month, you have access to the newest versions of Adobe Photoshop and Lightroom. Everything considered, it’s a pretty good deal (especially considering Photoshop in the pre-Creative Cloud era used to cost ~$600 for one license).
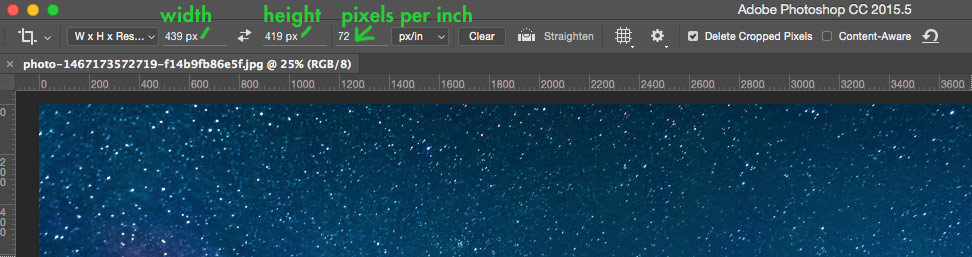
4. In Photoshop, hit C which activates the crop tool or click on the crop tool icon from the toolbar.
In the upper horizontal bar, you’ll see parameters for the crop tool. Choose W X H X Resolution from the dropdown menu, then enter in the goal width (439 px) in the width field, and the goal height (419 px) in the height field. In the resolution field, enter 72.
 5. Use the crop tool to draw a crop square/rectangle on the picture. Because of the width and height settings you entered, the crop square will be constrained and the actual crop will be the exact size you need. Frame the image however you’d like it, then hit Enter or double-click within the crop square to make the crop.
 6. Once you’ve made your crop, you may need to double-click on the Magnifying Glass tool or go to View > 100% to see what your image looks like at its actual size. If you don’t like the way the crop came out, you can undo and try again until you get something you like.
7. When you’re happy with the cropped image, hit (on a Mac) Command + Alt + Shift + S (Ctrl + Alt + Shift + S on Windows) or go to File > Export > Save For Web (Legacy).
As of July 2016, Adobe is trying to transition to a new Export As workflow based on their new, more efficient Adobe Generator platform for exporting image assets from PS. However, as of today, the optimization options and features present in Export As aren’t there, so we’ll continue to use Save For Web (SFW) until Export As has picked up the slack. Here’s Adobe’s official post on the subject.
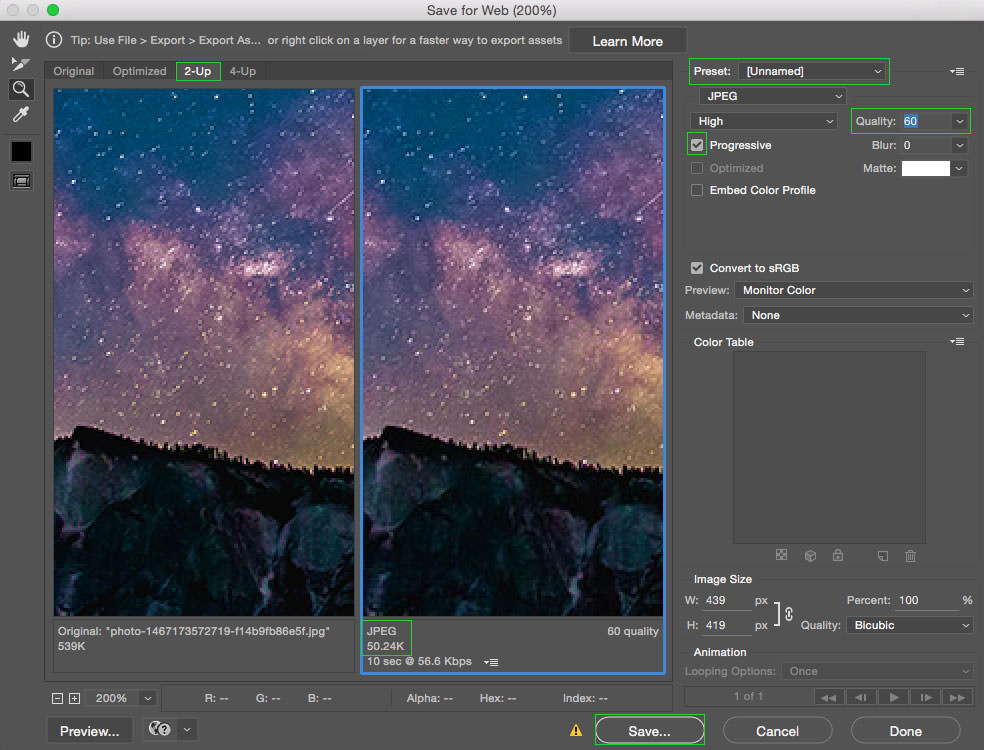
8. See the tabs on the top of this SFW window, Original, Optimized, 2-Up, 4-Up? To get an idea of what the original vs the compressed image looks like, click on the 2-Up tab. The window will show you side-by-side what the original (left) looks like, and what the compressed/optimized version (right) looks like. You can hit Z and then mouse click to zoom in on the image previews to get a good look at pixelation and image quality (hold ALT then mouse click to zoom back out).
9. From the Preset dropdown menu, select JPEG High. Click the Progressive checkbox (instead of Optimized). Progressive files are usually going to give you a smaller file size than Optimized (counterintuitive, I know).
Change the image Quality from 60 to 70. When making changes in the Quality box, look at the information in the bottom of the optimized window to see how the file size changes. At Quality 60, the image is 50.24 KB. At Quality 70, the image is 64.99 KB.
For this example, we’ll leave the image quality at 60 because we don’t notice enough image quality loss going from 60 to 70 that would warrant an extra 15 KB on the image size. You’ll have to make the call on each image you save about how much quality to sacrifice for file size. A lower number in the Quality box will mean smaller file size. Play with those quality settings until you’re happy with the result, then hit Enter or click Save.
 10. Head on over to JPEGMini.com and click on Upload Photo. JPEG Mini usually yields some additional file size compression without sacrificing too much image quality. With that said, after compressing with JPEGMini, check the two files side-by-side (pre and post JPEGMini compression) to make sure that you’re happy with the way the image looks. Find your image file and upload it.
11. JPEGMini will work its compression magic and present you with an even further compressed image file. It shows you exactly how many KB it’s saved on the download screen.
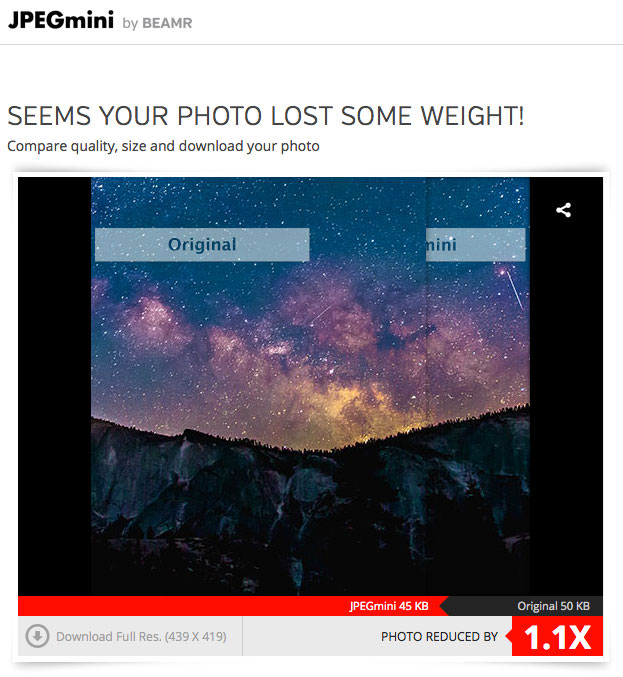
12. Click Download Full Res. and save it. It auto-appends the word “_mini.jpg” onto the file name that prevents you from overwriting the original file and allows you to compare the two files.
You can now take your optimized JPG image and use it on your webpage knowing that you’ve kept the image’s quality as high as possible while keeping the file size small. We went from 6.4 MB to 45 KB by optimizing this file.
Step-By-Step: How To Optimize Images For Web PNG
Now let’s do the same thing, only this time we’re going to choose a file best suited for PNG format instead of JPG.
Remember, the PNG-8 file format gives you a limited color palette (up to 256 colors), so you wouldn’t want to use it on a photograph like we used in the last example (we’ll show you why in a moment).
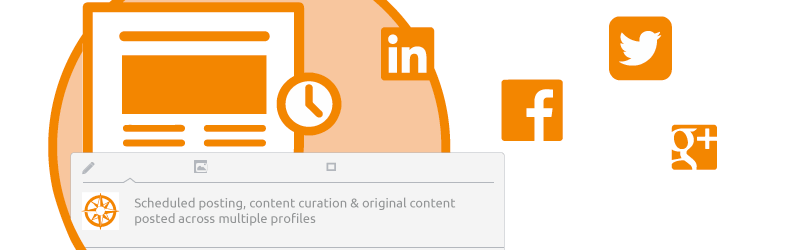
Anything that’s based on icons (ex: infographics), is illustrated, or needs background transparency should be saved as a PNG. We’ll also look at the PNG-24 file format which is the best option when it comes to saving an image with transparency for the web.
Why not GIFs? GIFs can support transparency, too. They are about equivalent to the PNG-8 format (there is no GIF equivalent to the PNG-24 format). GIF files overlap a lot with PNG files. Over time, the web has leaned more and more towards PNGs over GIFs (something to do with a patent on the GIF format). Plus, 9 out of 10 times, PNGs offer better compression and smaller file sizes than GIFs. So when would you use a GIF? Use a GIF if you’re making an animated GIF.
Here’s an image we created in Illustrator that needs to be saved for the web. We’ll review saving this file as a PNG with both a white background and a transparent background:
1. Follow the MeasureIt steps from the above JPG section to take a measurement of the space you want your PNG image to go. Let’s say we’re trying to hit 439px x 419px again.
2. With illustrated, vector-type images like this, many times you’ll be starting out in Adobe Illustrator instead of Adobe Photoshop. You’ll have a .AI (Adobe Illustrator) file or an .EPS (Encapsulated Postscript) file. You can do all of this Save For Web stuff in Illustrator, but for the purposes of this walkthrough, we’ll be using Photoshop as it’s a more commonly used application.
Bonus tip: You can access the same Save For Web dialog box using the same keyboard combination in Adobe Illustrator: Command + Alt + Shift + S.
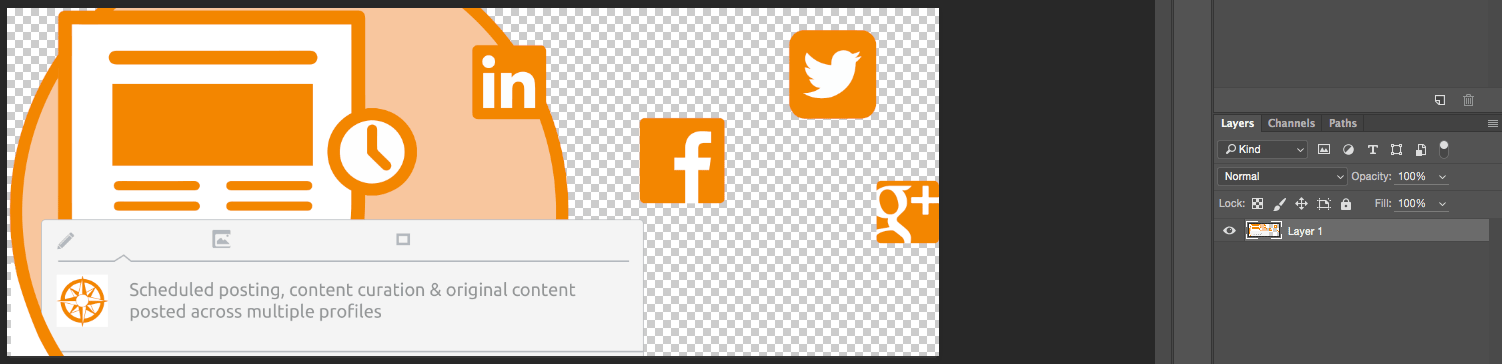
3. You can copy + paste vector artwork into a new document in Photoshop from Illustrator OR open the EPS or Illustrator file directly in Photoshop. If copy + pasting from Illustrator, first select all of the artwork on the artboard in Illustrator and hit Cmd + C or Edit > Copy.
4. With the copied vector art on your clipboard, go to Photoshop and hit Cmd + N or File > New. Photoshop intelligently gives you a new document size that exactly fits what you’ve copied. Just accept the document size they recommend and hit Enter.
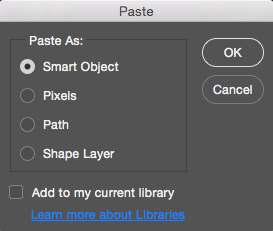
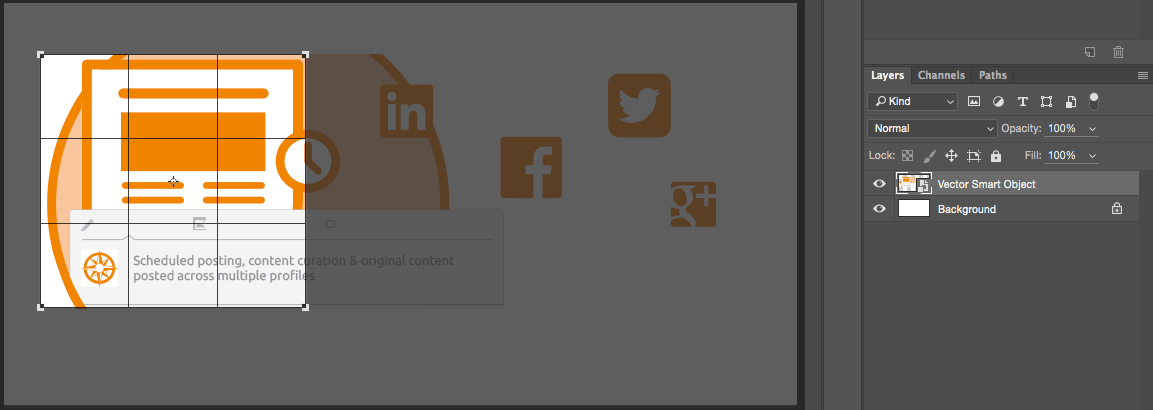
5. On the new PS document, hit Cmd + V or Edit > Paste. You’ll see a popup window that prompts you with options. Choose Smart Object as it’ll retain the scaling capabilities of the vector artwork within Photoshop. If you need to edit this artwork within PS, you can right click on the layer and select Rasterize.
6. If opening the EPS or AI file directly in Photoshop, you’ll usually be able to see a transparent background right off the bat when you open the file. If not, and you don’t see a white background layer that you can toggle on/off in your Layers tab, you may need to open the file in Illustrator or another image editing program to copy out only the graphics you need while leaving behind the background color.
7. Once you’ve got the artwork open in Photoshop, follow the steps outlined in the JPG section above that reference using the Crop Tool in PS. Enter the dimensions that you need your final image to be, and make your crop.
8. When you’re happy with the cropped image, hit (on a Mac) Command + Alt + Shift + S (Ctrl + Alt + Shift + S on Windows) or go to File > Export > Save For Web (Legacy).
9. PNG WITH NO TRANSPARENCY – For smaller, less detailed files
In the Optimized tab, in the Preset dropdown menu, select PNG-8 128 Dithered.
There are a few things you can experiment with here. It automatically checks the Transparency box for you. However, if you look at the edge of the artwork where the graphic runs into the background, you’ll see a thin white border. This is generally undesirable, and it’s the reason why we recommend using the PNG-24 format when saving with transparency. You can modify the color of this white border using the Matte: dropdown menu, but even if you select None, you wind up with a jagged edge.
If you are saving a PNG WITHOUT transparency, it’s highly likely you should save it as a PNG-8. You can uncheck the Transparency box and play around with the Colors: dropdown box. The numbers (2, 4, 8, 16, 32, etc.) indicate how many colors will be used in the PNG file’s color palette. If you have a simple two-color logo, you can set this number to 2 or 4. If you have many colors, try 128 or 256. The more colors you choose, the larger the file gets, but the closer to the original image quality it will be. Fewer colors = smaller file size.In most cases, your Matte: dropdown selector should be set to White or None.
In the lower left-hand corner of the Save For Web dialog box, note how changing these settings also changes the file size.
Using the preview window in conjunction with the file size output, find an image quality and KB size you’re happy with, then click Save or press Enter.

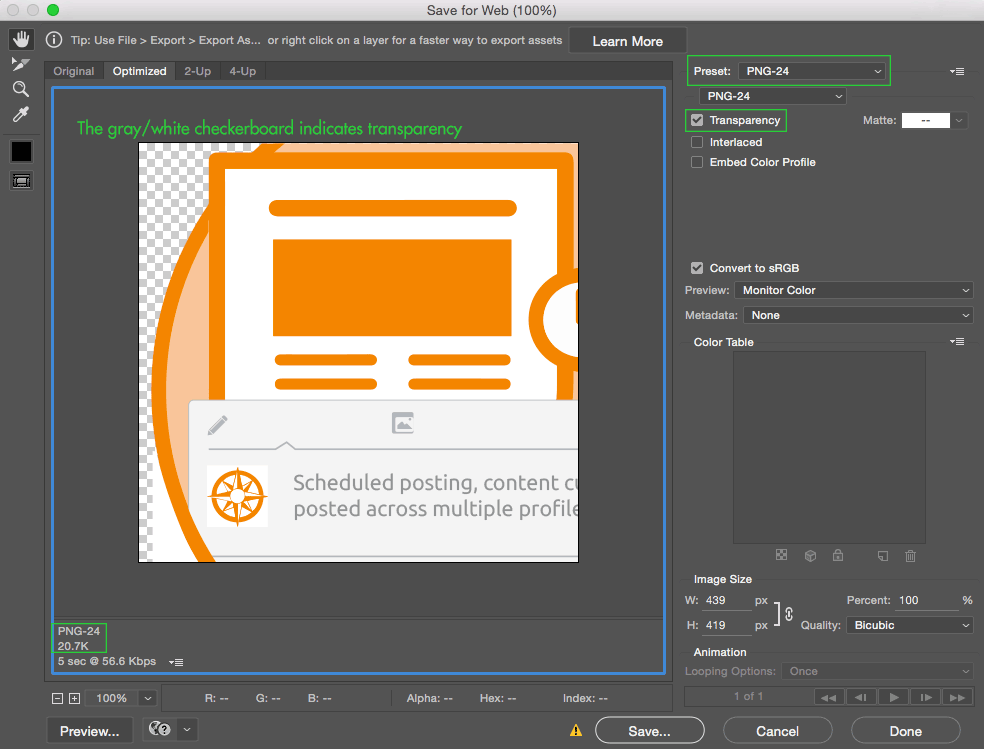
10. PNG WITH TRANSPARENCY – For higher-resolution and super-clean transparency
From the same Save For Web dialog box, in the Optimized tab, in the Preset dropdown menu, change your selection to PNG-24. Notice how much cleaner your image’s edge is using PNG-24 vs PNG-8? Also notice that the file size is much larger compared to PNG-8.
When saving as PNG-24, we usually just check the Transparency box and leave everything else as default. Once you’re satisfied with your image, click Save or hit Enter.
11. If you save an image as PNG-24, the image file may be much larger than you’d like. Fortunately, there’s a great, free online tool called Tiny PNG.
12. Go to http://tinypng.com and upload your recently saved PNG-24 image file. Tiny PNG is most awesome if you upload a rather large PNG file (100 KB+) as smaller PNGs tend to not realize a noticeable file size improvement. Their tool is pretty self-explanatory:
Upload your image file, give it a second, and see how much Tiny PNG was able to compress your image.
Note that we used a different PNG than the previous example file to show the capabilities of Tiny PNG’s compression capabilities. Our original example PNG image started at 20 KB, so we saved a larger image with transparency to showcase the compression. 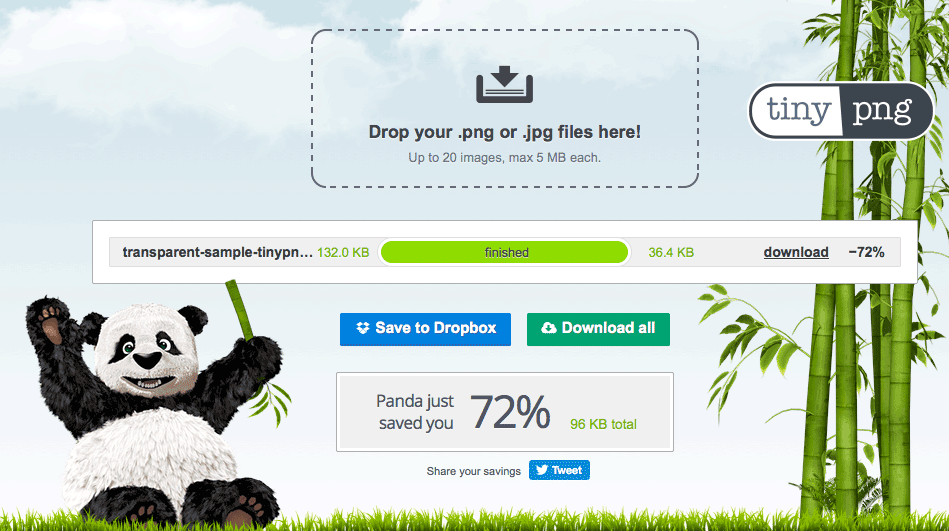
13. Hit Download and save your file with a _mini.png or a slight name change so that you don’t overwrite your original file. You can then open both files side-by-side to see which version you like better. Normally you can’t tell the difference and can use the compressed file, discarding the original PNG if you wish.
What About WordPress Image Optimization Plugins?
We have used WP Smush and you can too, however, we find our images get better compression and quality using the steps outlined above. If you have LOTS of images already on your website that need to be compressed and optimized, go ahead and try WP Smush as they offer a bulk “optimize images for web” compression option via your Media Library.
Have you found other creative ways to compress and optimize images for web? Tell us in the comments below!
About The Author

Lorraine Wolfe
With 11+ years of marketing & design experience, Lorraine is constantly learning new techniques to bring more value to your company. When she isn’t reading her newest marketing book, she can be found doing one of four things: fishing, snowmobiling, micro-brew tasting or watching Star Trek. She’s the proud owner of both a chihuahua and a doberman.
Thank-you for creating this accurate and current article. It adds clarity to my understanding of some of the finer points and is a refreshing reference that I can apply to my work (photography).
Keep up the great content!
Thank you for this article.
Finally the step-by-step guide i was looking for and some clarity on the jungle of images for the web.
This was very helpful! Thank you. I’m controlling what I upload now instead of uploading large image files that get compressed by the server and look so degraded.
I guess if someone is well aware of how to optimize an image in Photoshop then it would not be so necessary to use any automated tool. As its not only about compressing any image rather its about make the image ready for using in web. Thank you for showing the steps with brief explanation here in this post.
I never comment on blog post but this one is truly awesome. Thanks for all the detailed input. I am going to apply all of this to my site today.
Thanks for sharing.
Very helpful & detailed article!
Thank you very much, I was looking for this!
This is great. Exactly what I do – however, my company still thinks I am the dumb dumb because Shopify is pixelating my copy over an image. “The last designer had no issues” is what I get… I finally looked at the Shopify site, and pretty much all of the copy is reversed out in white. Not all platforms work right even when you optimize your files. White or dark copy seems to be the trick – middle values are ify. Sucks when you have to design ads fast for several different platforms and they all behave differently. Not one file format works, unless you learn to design differently.
Hello,
Very helpful!
I need to upload Low res and Hi-res images to a website, so customers can download HR: 300 dpi -1200 pix. How can I save these images? Size is about 1-2 MB. Way too big…